
Welcome to part 3 of my going paperless journey. If you haven't already, you may want to check out part 1 and part 2 to get some context, but you don't have to. In summary, part one discussed the details of general paperless classrooms and answered some basic questions. Part two delved into my own experience and how I ended up developing my own tools. This part concentrates on how I developed and used my own tools within my classrooms and departments.
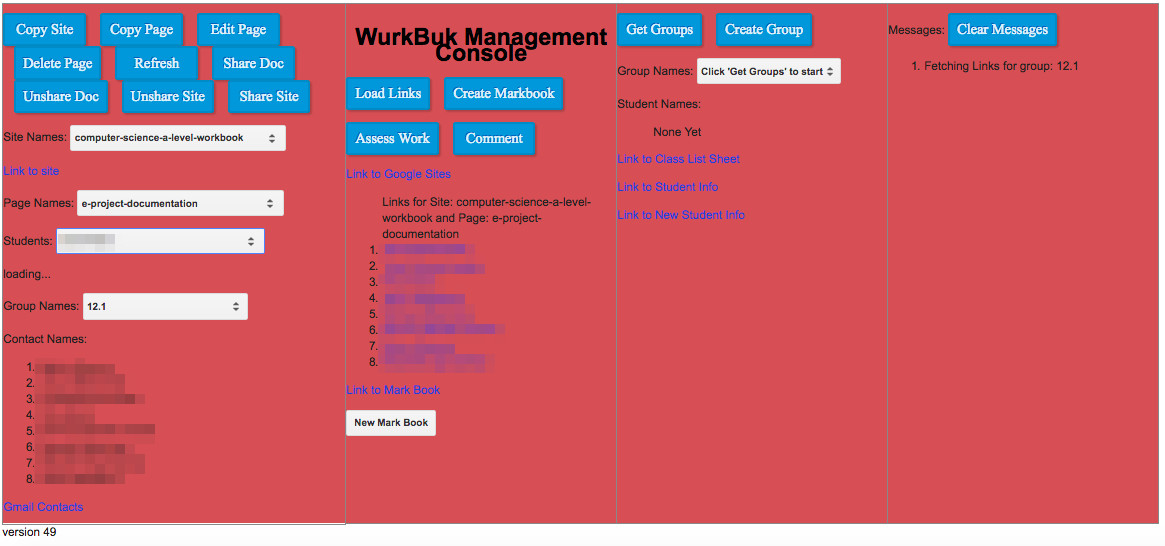
I was able to develop my program using JavaScript, Google App Scripts, HTML, and CSS. There is a basic script editor hidden within Google Drive which was used as my IDE, which wasn't perfect but was manageable. I was able to run the scripts and generate a good enough output to use, and when it was complete, I was able to run it as a web app. Below is version 49 of the working prototype, which was largely bug free.
Main Functions
Copy Site: If you read part 1, part 2 or my post on using Google Sites as a medium of instruction, you would recall that I created Google sites and shared the link with students. This contained the lessons and resources for the students and allowed them to follow the lesson at their own pace from home and school. The management console allowed me to create a copy of a master Google Site for each student in a class allowing them to have their own digital workbook. To do this I would first have to choose the Site Name of the Google Site I wanted to copy for the class, and the Class I would want to copy it for from the Group Names section. In the diagram above, I have chosen the computer-science-a-level-workbook for the 12.1 class (year 12/ lower 6th form/ 11th Grade/ age 16 to 17). The site would then be copied for each student in the class with their name attached, and access rights set, so only the student and their teacher would be able to view it.
An example of a master Google Site, which would be copied for students is below.
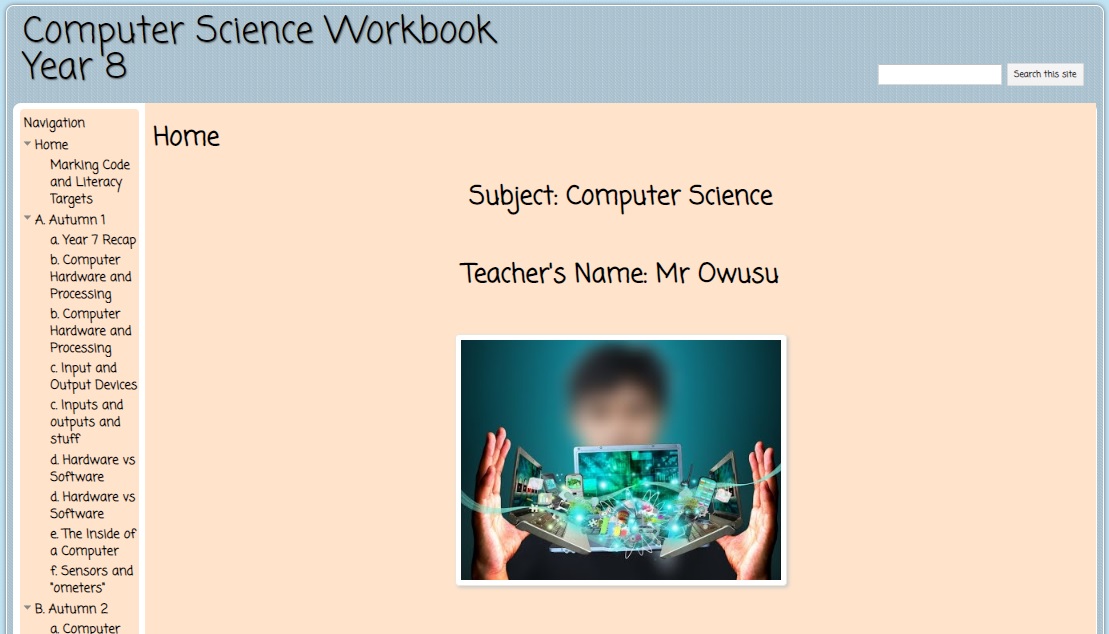
The site above was a Year 8 workbook which contained lessons and embedded resources (worksheets, tests, and learning material). It also contained differentiated lessons. If you look at the menu list on the left, you will find some duplicated lessons, one being "d. Hardware vs Software". One would have been for more able students, and another would have been for the rest of the class, and they would have contained slightly different resources respectively.
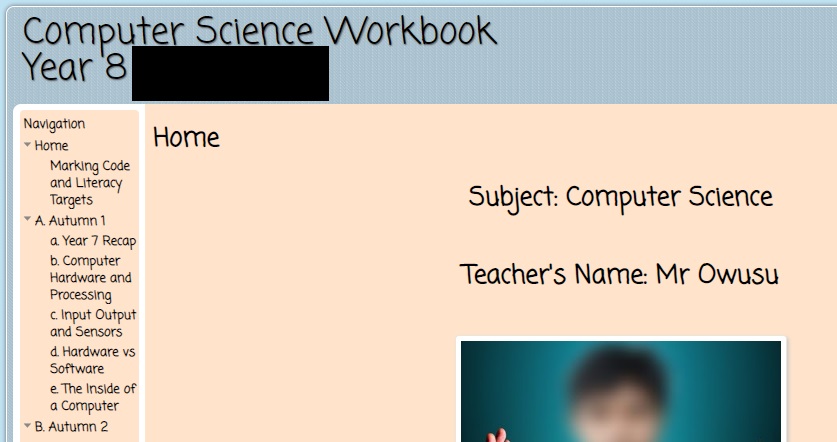
Below is an example of a specific student workbook (with the student's name blanked out), which has only one version of the "d. Hardware vs Software" lesson.
Main Section
Copy Page: This button was used not only to copy individual lessons, such as the "d. Hardware vs Software", but could also generate individualised worksheets. Once, the Google Site was chosen, the pages available (the lessons available for that class) would be displayed. A lesson could then be chosen using the "Page Names" selector, and then a class would need to be chosen from the Group names selector. Once the Copy lesson button was pressed, the management console would copy the page to the student workbooks and would also copy individual copies of any Google Docs, Sheets or Slides within the site, just like what Google Classroom would do. The Google Docs would include the name of the student within the title and access rights would automatically be set. I decided that the best way to manage this was for me or the teacher to have ownership of all student documents. This would stop students from being able to delete their work, and would allow me to easily mark and keep tabs on student work at different stages of completion. Lessons with the same page title could have a different page name. So I could have multipe "d. Hardware vs Software" pages. If a Master Site already containing lessons was used to create a student site, then the pages would also be copied. However the resources would not be. This is because the copy site button would copy all pages, even differentiated lessons which were not aimed for the student. After the creation of the student site, those pages could be deleted, and waste resources would not have been created.
An example lesson page (click to enlarge) is below. The resources are highlighed below and these would have been copied for each student.

Edit Page: This button would be used if changes needed to be made to student lesson pages after they were initially created. This was also used to copy resources to the page for the individual student, if the page was originally copied using the copy site button (as this would not have created individualised resources).
Delete Page: This was used to delete pages from student workbooks that were created by accident or copied along with the whole site when a copy site action was used.
Refresh: This was used to refresh the Management Console. If a new page was added to a master Google Site, while the console was running or a new Site was created, then refreshing it would allow the console to identify it and use it.
Share/Unshare Doc: These buttons allowed me to control the access rights to the Google Docs, Sheets or Slides on specific pages. They allowed me to either share or unshare docs witih the students, which was useful for sharing tests or test results, and also managing timing within the class, if I wanted students to wait before starting an activity.
Share/Unshare Site: This was only used during testing. It would be used to unshare the students complete workbook stopping them from using it as a resource during exams or tests, where necessary.
Site Name: This was the name of the Google site, which was used for identification and access witihin the URL. This was different from the Site Title which was used for display purposes. Similar to the page name, it was possible to have multiple sites with the same display name, or site title because they had different site names.
Link to Site: This was a link directly to the Google site selected from the site name selector above.
Page Name: This was generated by the console pulling all the pages from the Site highlighted in the Site name selector. These represented the different lessons that the students would do, and the lessons that would be copied to their workbooks.
Students: This highlighted all the students in the class that was chosen from the Group names selector. Once a student was chosen, a link to the student workbook would be generated directly below it (where the "loading..." text currently is).
Group Names: This would be the list of classes I had in my class. For this I used the Google Contacts tool. Groups would be created for each class and student details would be imported into the groups. I'll talk more about how this worked later.
Contact Names: This was a list of the students within the class selected above.
Gmail Contacts: This was a direct link to the Google Contacts website.
Assistant Tools Section
The next set of tools were aimed at providing more efficiency in marking.
Load Links: This was a button that generated the URLs of the workbooks for all the students in a particular class. This proved to be quite useful for marking.
Create Markbook: This was another initiative to help with marking. This function created a whole new Google Site for marking of particular activities or used an existing marking site if one already existed. This would then create a series of linked pages for the students of a particular class with only that activity on each page. So I could cycle through all the activities of a particular class and mark work.
Assess Work: This was an attempt for me to check that homework was done, by using the editing times function of Google docs. If I set homework with a deadline, this function would check the document for each student in the class, to check their edit times. If there was no edit time, I could tell the document was not accessed, and therefore homework was not done. I therefore would not bother opening the document to mark it, saving me time.
Comment: This was a function that saved me a considerable amount of time. This took my student comments which I placed on a spreadsheet, and transfered them as comments to their documents. I would first have to write the comments in an associated group of cells on a spreadsheet after using the markbook to mark their work. I found this much quicker than opening up a comment box on their actual documents and writing it there. I could also use a set range of comments, depending on the marks and work done and copy and paste them for students (with some individualisation), which further sped up the process.
Link to Google Sites: This was a link to the Google Sites main page.
Specific page links: Links to student pages if called would be placed here
Link to Markbook: This was a link to the markbook used and explained in the create markbook section.
New Markbook: This was a button that generated a new Google site which would then become a markbook. The names of the current and previous markbooks were all held in a master spreadsheet with configuration information.
Class/Group Management Section
This next section was for the purpose of managing the student class lists.
Get Groups: Google Contacts was used to manage the class lists. In order to create the class lists, I first exported a list of email addresses and names of my students arranged by class. I had to seek the assistance of the school IT manager for this. These lists were placed on a Google Sheet by tab, each tab represented a class, ranging from 8 to 31 student records. The Get Groups button would access the Google Sheet and read out all the tabs which would be the different classes on that sheet. I would then be able to select the different classes and display the student names via the drop down list Group Names.
Create Groups: This button would use the information extracted from the class lists spreadsheet and create a Google group containing the students in the class. The alternative to this would be to go directly into Google Contacts, manually create a group then search for each of the students and add them to that group. The function to do this automatically did take a bit of time, but not as long as it would take manually. Also, while this was being done automatically, I could get on with other work.
Link to Class List Sheet: This was a URL to the class list sheet containing the student details.
Link to student info and new student info: This was a URL to my main mark sheet with student information on it. As head of department, this contained details for all the students in the school, such as email addresses, baseline data, and CS specific marks and details.
Messages section
All the function run by the management console gave a message output for each step. The output messages would be written here, enabling me to keep tabs on completion and any errors that may have occured. This could be cleared when necessary.
Review
This system worked very well for me and the students enjoyed using their computer science workbooks. I ran a questionnaire for the students on the system and it showed that there was a 90% approval rating. However, developing it did take up a lot of time. There were other functions created like a self marking test (which I will discuss in a different post), which proved to be extremely useful. The main issue that I had, which would become an increasing issue was that this system created a Google site for each student in the class. As all the students in the last school I used this system in did computer science, that was 100s of students. I started working at the school when it was only a year old. So in the first year, that was about 360 students. For a full school that would be considerably more. Considering the fact that each workbook would last only one year, would mean that within a few years that could lead to thousands of Google Sites. It was also not possible to automatically delete Google Sites, so they had to be done manually which took a while.
How was this better than other VLE's? First of all, this was totally free and used partly open source systems, so I had a large amount of control. Second, it was tailored directly for my students, so was made to be user friendly for them. Thirdly, it was geared towards how I wanted to teach, tailored to my teaching style. I would not have been able to do this with many other VLEs. This was eventually used by one other teacher who found it tricky initially, but managed to do the basic functions. The system was then outsourced to the 6th form department in my school and used to create their Sixth Form Portfolios for all year 12 and 13 students. This was a system that kept tabs on student performance, through their A-Levels and allowed students, teachers and parents to communicate. Even though this was good for what I wanted, there was plenty of room for improvement. I wanted it to have a better look and feel with more usability, with the aim of all teachers and other schools using the system.
One of the main benefits of my system, which I could not find from other systems was the return to the showing off of learning evidence. With a textbook or exercise book system of learning which was the norm for most subjects, looking through the student book showed you what the student had done and how they had progressed. It wasn't a perfect indicator of knowledge and learning, but it was pretty good. Most VLE's I found, tended to hide what the student had done within links, or showing student work would take effort. My system held student work front and centre within the pages of their lessons, and this is what I found important for students, parents and teachers. The move away from this made it more difficult to see what the students had done, made it difficult to revise and made it difficult to reflect. This is what is missing from Moodle, Edmodo, Google Classroom, Blackboard and many of the other school VLEs, which is the main reason I wanted to develop an alternative.
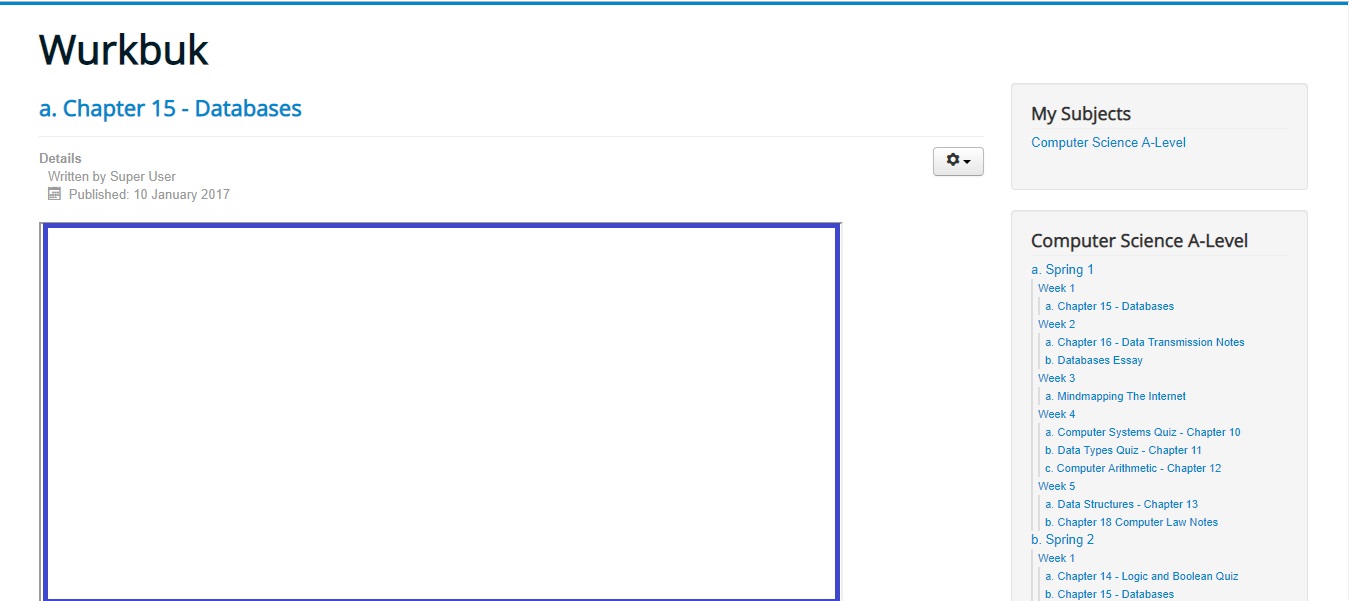
This and my intention to use a more open source manageable and controlable platform, is what eventually led me to turn away from Google Sites to use Joomla. This would then allow me to have full control of the databases and the look and feel of the whole system. Below, you can see the initial look and feel, however, I will talk a bit more about this in part 4.
Source: