Welcome to part 2 of this series, which will discuss how 3D printers cover a wide range of STEAM components in education. In part 1, I laid the groundwork and covered the basics, such as the history of 3D printers, the process of printing from start to finish and how the different aspects met the STEAM components.
In part 2, I will discuss building the printer and the electronics, along with the association Technology and Engineering components of STEAM.
Putting the printer together - Technology, Engineeing
The printer I will use as reference throughout this post and others is the Anet A6. It is not as popular as its older brother the Anet A8, but is slightly more modern, and is similar enough to share parts. Putting the parts together was fairly straight forward. Instructions were included as were links to a youtube video.
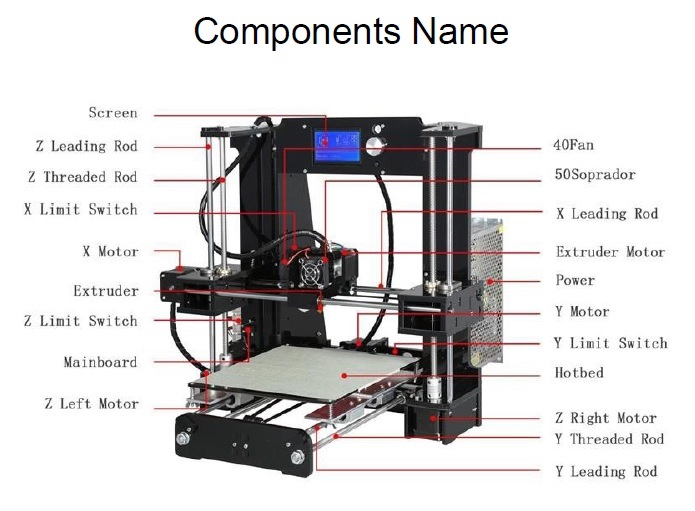
Looking through the video, this is definitely something that can be done in a group. Although, following the video or simply following the instructions in the PDF is all that is required, looking through all the different components that go towards making a machine like a 3D printer can really highlight the Engineering and Technology components of STEAM. For example, how the machine is designed, how the moving parts work, how the electronics (which are discussed below) work with the mechanical parts.
The electronics and circuitry - Technology and Engineering (Electronic)
The building stage includes fitting the electronic components, the motors, the limit switches, the fans, the screen, and the mainboard. The mainboard is a great component for introducing electronic engineering. You can discuss input voltage (12v) which goes to the components, the resisters, capacitor, and inductors which are attached to the board. This should cover what they may have learned in physics classes. You can also discuss the variable resistors, on the board, used to adjust the voltage that goes to the stepper motors. There is only one on this Anet board, but on others, you find a resister for each stepper motor connector. You can also discuss the main processor and the hardware included.
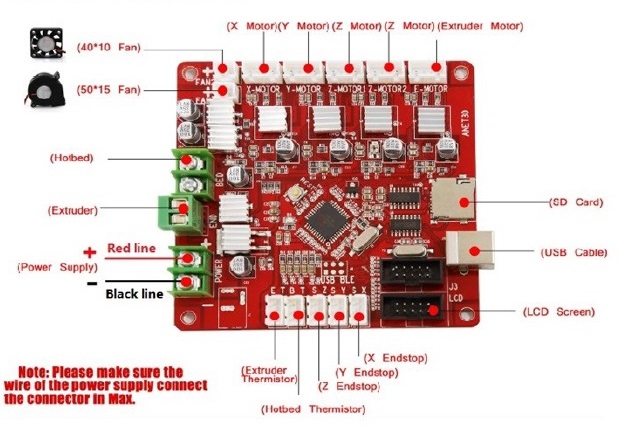
As mentioned in part 1, this board is based on Arduino technology as are many other 8-bit 3D printer boards. The main processor which runs this can also be discussed, and programming this, which will be discussed later, could be a great project for an enthusiastic GCSE/Grade 10 student, or an A-Level/Grade 12 student. There are many other boards that you can use to replace this board if you want to upgrade. My upgrade was purely because I wanted one that was better quality. So I went for the OVM20 Anet by Staticboards, which unfortunately, seems to no longer be available. This had an inboard fuse, quieter stepper motor drivers, and better inbuilt MOSFETs. It also required little to no change to the existing circuit configuration, which many other mainboards would require. It was also all black with blue lights, so looked much better with my enclusure which I will discuss in part 3. 32 Bit 3D printer mainboards are also available, which technically run much better and smoother than the standard 8 bit boards when managing the GCode required for the print. These require different software/firmware than Marlin and don't use Arduino technology to my knowledge. For more details on a wider range of boards, check out this article on the '2019 Best 3D Printer Controller Boards' by Mika Yeap for All3DP website, and 'Why Your Next 3D Printer Should Use a 32 Bit Controller' by Varnak for the Mechlab website.
This would also be a really good stage to highlight the safety issues related to 3D printers.
Safety
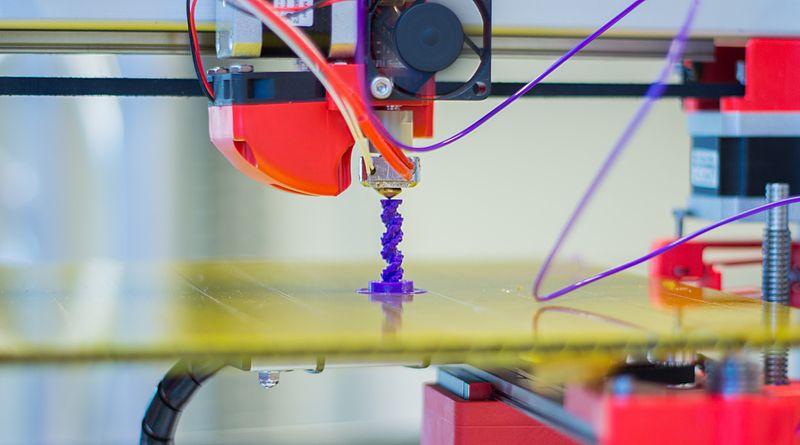
FDM printers work by heating up a plastic filament to melting point and placing it layer by layer on a particular surface. The printer uses something called a metal hot end to do this, and it can reach temperatures of up to around 260 degrees Celcius on basic 3D printers. The high temperature can obviously be very dangerous if care is not taken. If the print area has not been cleared, or flamable material builds up, the hotend can set it alight and cause a fire.
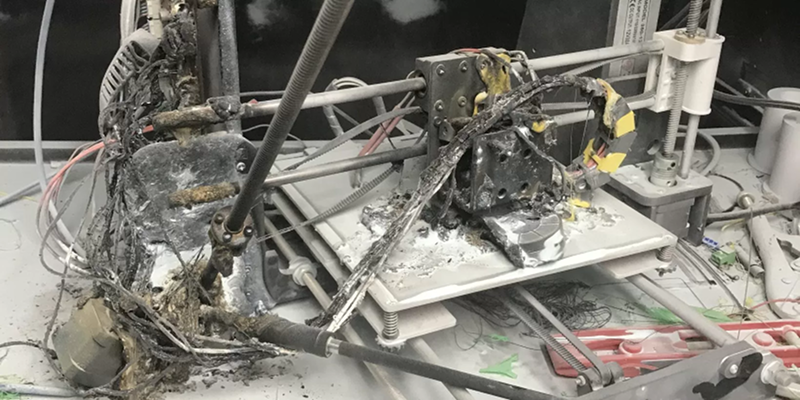
Other potential hazzards are the electronics. The 3D printer is powered by a 20 watt, 12v power supply, which is connected directly to a wall socket, 110v-240v depending on what country you live in. This is then connected to all the electronic components, such as the motors, the screen and most importantly the circuit board. The basic kits don't include a power switch. It is extremely important that the connections to the circuit board are secure and done with care, as to not damage the board itself. This is because, there have been serious reported incidents in the past, related to older versions of the Anet A8, the version before the A6 (see image above).
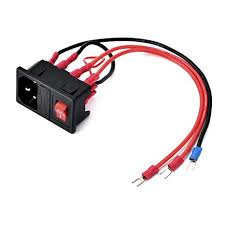
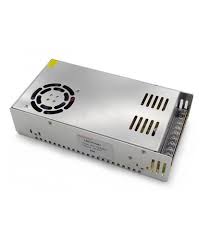
Since then, the equipment has been updated to make those hazzards less likely. However, there are still some precautions that can be taken to be even more safe. The first that I would highly recommend is adding a fused switch to the power supply. That way, if there is a power surge, it will stop short of the mainboard, saving it from damage and potentially shorting, which could lead to potential danger. The second is to actually change the power supply, and purchase a more powerful one. I changed mine to a 30w supply with a fan (the original 20w one was fanless). The higher quality power supply was able to regulate the voltage better and thus maintaining the quality of the components for longer. The final one was to add mosfets to the board. This essentially moved the high current which was driving the heated bed, away from the main board and onto an external board, thus keeping the mainboard free of the added current strain.
 |
 |
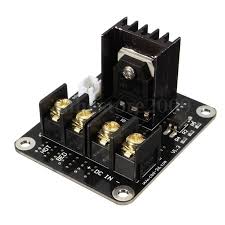 |
| Fused Switch | 30w Power Supply | Mosfet |
These items are fairly cheap, but greatly improve the safety of the machine.
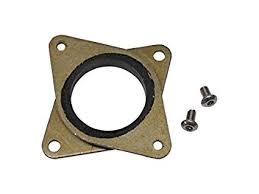
Another issue I faced was when I attached a stepper motor dampener to one of my motors. I did this to reduce the amount of noise that they made, as they could get quite loud. After the installation of the dampener, the motor began to touch part of the underside of the printer bed ever so slightly. I didn't see this as a huge problem at first, until after a long print, smoke started to appear around the printer. This was due to the friction that the touching part had caused. The only thing that alerted me to this potentially serious issue was the smoke alarm I had fitted to the enclosure that I made for the printer. A smoke alarm can be inexpensive and can alert you to any issues well before those issues have the chance to become serious.

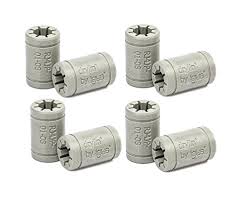
The ability to adapt and change the components further for other purposes is another big part of Engineering component of STEAM. As mentioned previously, the printer was quite loud at parts, and required oil. Some parts could were also changed, such as the drylin bearings which allowed the print bed to move back and forth. These plastic self lubricating components were much quieter than the metal ones that came with printer. Stepper motor dampers also reduced the amount of vibration that was caused by the motors.
 |
 |
| Bearings | Stepper motor dampers |
These were some of the items purchased and added to engineer a quieter printer. One project that would be really good to set for students would be to make adjustments to make the printer much quieter. The fan would be the next step for me, which is one of the loudest part of the printer.
On top of the simple fixes through purchasing extra equipment, another great opportunity for technology and engineering in the building process would be to print parts to improve the quality of the machine. This is the main advantage of the Reprap movement. Some adaptations are listed below, via the Thingiverse website, which is one of the 3D model repositories.
- Autobed leveling sensor and printed adapter - Helps to level the bed better
- X Belt Tensioner and Y Belt tensioner - keeps the belts at the right tension for better movement
- Cable holder - stops the constant movement from deteriorating the cable for the heat bed
- Powersupply switch holder - something to hold the power supply switch onto the power supply
- Extruder fan easy access adapter with magnets - allows you to see the filament as you thread it through the hotend
- mainboard case with fan - keeps the wires around the board orderly ensuring safety
The final adaptation that I would like to mention, which would be a great topic for students related to the engineering side is to change the extruder from direct design, where the motor that pushes the filament through is attached to the print head to a bowden design, where the motor is not attached to the print head. One of the main issues that affects the quality of prints in vibrations at high print speeds. The weight of the stepper motor that powers the extruder can adversely affect this, so moving it away from the reduces the weight and improves print quality. The physics and engineering behind this issue and the Bowden design could in itself be a topic of great interest.
This is by no means an exhaustive list of topics of how to discuss Technology and Engineering during the building of the 3D printer, but this covers a lot to at least get started and more. The next part will cover the creation of an enclosure, as well as the 3D printing filament, which should cover engineering, mathematics, art and science components of STEAM.
Sources
- https://commons.wikimedia.org/wiki/File:Felix_3D_Printer_-_Printing_Head.JPG
- https://www.amazon.com/Printer-Switch-Richer-Adapter-Installation/dp/B07CLG77Q8
- https://www.indiamart.com/proddetail/power-supply-for-3d-printer-cctv-robotics-12-volt-30-ampere-18680156748.html
- https://www.aliexpress.com/item/32814486198.html
- https://www.newegg.com/xiaomi-tech-mdc3207-smoke/p/208-009D-00005
- https://www.amazon.com/Pieces-Igus-RJ4JP-01-08-Printer-Bearing/dp/B076NWK2NK